You can also use Command Prompt to update the driver in your Windows 10. How to do that? Well, this article is all about that where you can know how to update drivers using Command Prompt in Windows 10.
Update Drivers Using Command Prompt
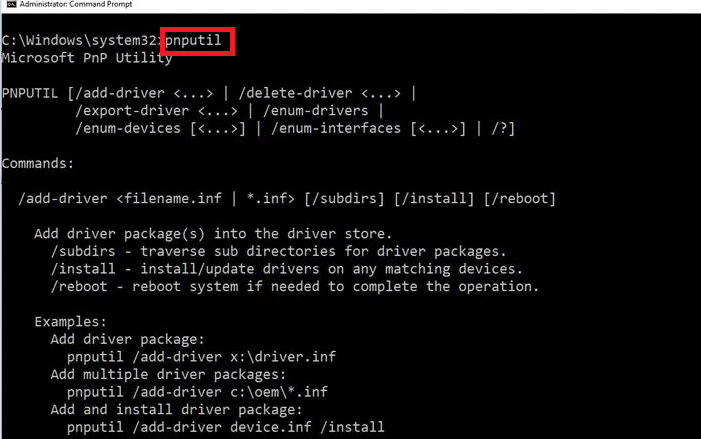
Windows offers you a PnPUtil tool integration which can help you download a driver package, install/add the driver and if you wish to uninstall it in the future, it also allows you to remove the driver from the list. Let us take a look at the steps that can help use Command Prompt to update drivers in Windows 10. To begin with this process, you first have to download or transfer the driver package on your computer. You can download it by visiting the OEM website or use the pen drive to transfer the package into your PC. Once you have downloaded/transferred the driver package to your computer, you can install it using the PnPUtil.exe tool by entering the path to the INF file that has details of the driver which needs to be installed. Read Also: Update Drivers Using the Best Driver Updater For Windows
PnPUtil Syntax
/export-driver <…> | /enum-drivers | /disable-device <…> | /enable-device <…> | /restart-device <…> | /remove-device <…> | /scan-devices <…> | /enum-devices <…> | /enum-interfaces <…> | /?] Here are the steps to update the driver in your Windows 10 using command prompt:
How to Add a Driver
If you are looking for a way to add the driver, here are the steps that you can follow: Read Also: How to Update Wifi Drivers on Windows 10, 8, 7
How to Remove a Driver
So far you have come across the steps to install a driver using Command Prompt. If you want to remove the installed driver, here are the steps that you need to follow.
Manage Your Drivers Using Command Prompt
So, that was it for updating drivers using Command Prompt in Windows 10. It is quite a simple method to update, install or even delete a driver in your Windows PC. Did you find this article helpful? We’d love to read your views and suggestions in the comment lane.
