Some of the keys or combinations of keys are assigned functions to make the work easier. You can check them and apply them when you are working. In this article, we will help you with the process of downloading the software and updating it. You are going to find the steps using which you can easily download the Logitech G910 driver and software. So without any delay let’s take a look at the methods and their steps which you can follow to install the Logitech G910 software.
Methods to Download Logitech G910 Software Easily
Here are the methods that you can follow to download and update the software easily.
Method 1. Install Logitech G HUB Software
Just like every other software or driver which gets installed when the PC connects to the hardware, the Logitech G HUB software also installs automatically. If you are facing an issue with the automatic installation of the software you can manually install the software. To help you with the process we have mentioned the steps which you can follow as mentioned and find a solution for how to install Logitech G910 Software or Logitech G HUB software.
Open the browser and visit the official website of Logitech.Now in the website search box type G910 or the model number of the hardware. The search box is situated on the top right corner of the website’s screen.
From the results displayed click on the images of G910.
Out of the options displayed on the screen, click on the ‘Support’ option.
Also Read: How to Fix Laptop Keyboard Not Working on Windows 10
Now click on ‘Download’.
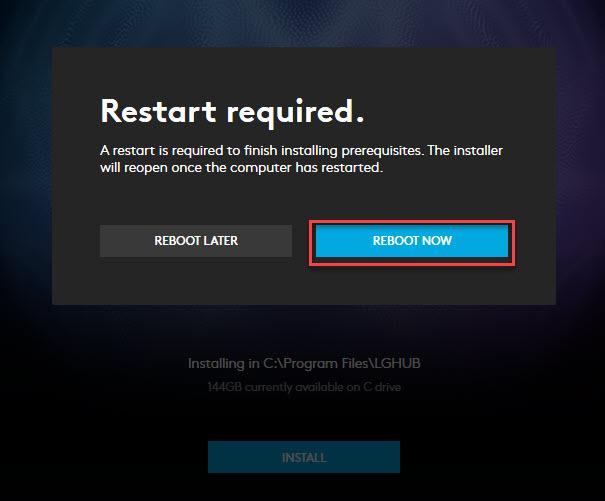
Open the downloaded file, the system will ask permission to reboot. Click on the ‘Reboot Now’ option.
The installer will start after the computer restarts. Click on the ‘Install’ option.
That’s it, now you have successfully installed the Logitech G910 software on your PC and use your new keyboard. After some time the drivers who are relevant today will not be relevant tomorrow. So in that case you would need to update the drivers. In the next method, you can check the method using which you can simply update the drivers. Also Read: Fix: Mouse Cursor Disappears On Windows 10 [Solved]
Method 2. Update Logitech G910 Software/ Drivers
Keeping the drivers and software updated is the main and most important task for any user as if the drivers are outdated the user can face issues with the process and connection. While some of the users face the issue of connection error try and reinstall Logitech G910 software. This reinstalling method could work but why follow a lengthy and time-consuming method when you can simply resolve the issue. Below are the steps that you can follow to keep your driver updated and keep your hardware error-free. So let’s a look at the methods to update Logitech G910 software.
1. Manual Method to Update Drivers
Under the manual method for updating, there are many sub-method that you can try, we have listed the most common and the easiest method below. Though we don’t recommend the user to follow the manual method as it is time-consuming and recurring. In this method, we will be updating the drivers using the Device Manager. So let’s take a look at the steps.
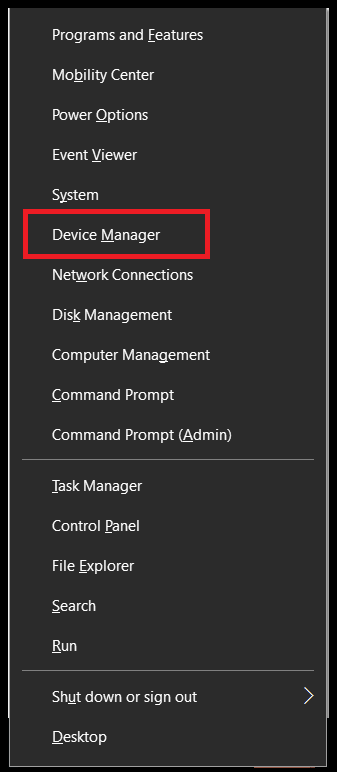
Right-click on the Windows icon from the bottom left corner of the screen.
From the menu that appeared, select the ‘Device Manager’ option.
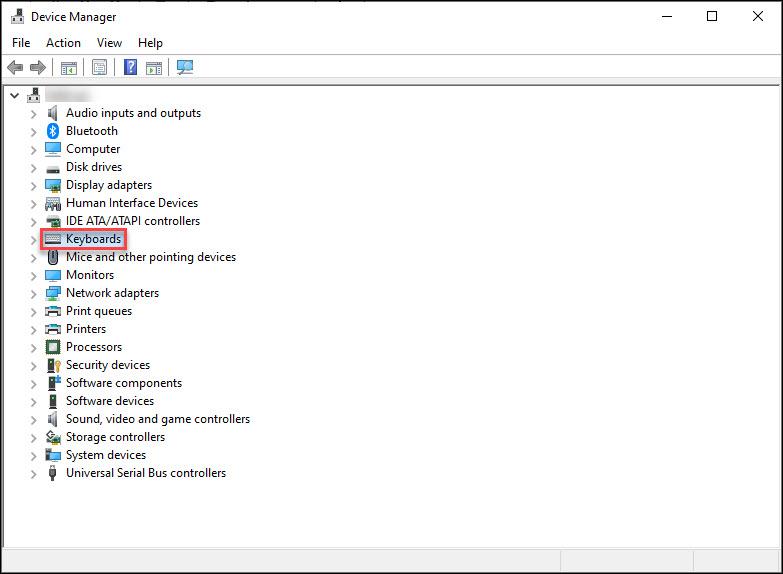
A new window will appear, select the keyboard option from the list.
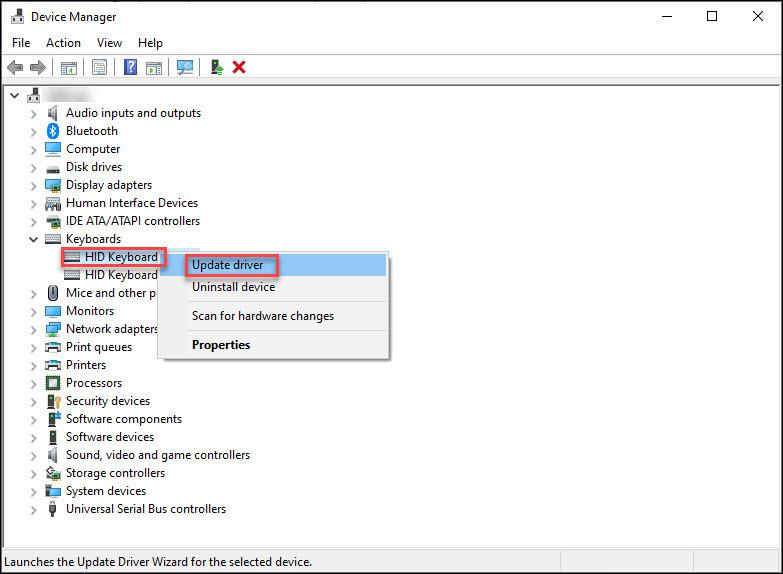
Right-click on the HID Keyboard option and then click on the Update Driver option.
Also Read: How to Update and Reinstall Keyboard Drivers on Windows 10
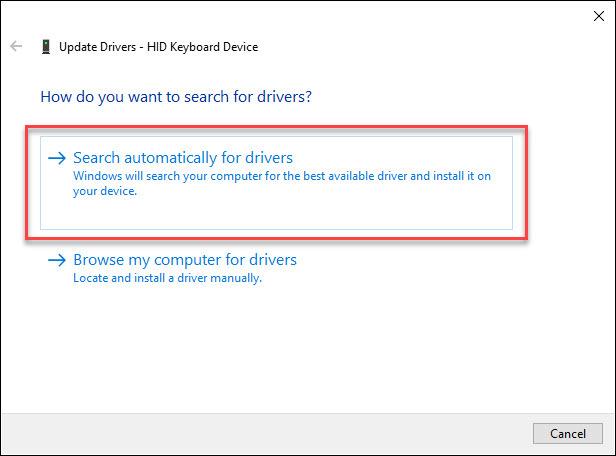
Now click on Search automatically for drivers. ( by clicking this option you will allow the PC to search for the best driver for your PC, this option makes your work for searching the driver easy.)
After the PC searches for the driver, follow the instructions on the screen and install the drivers.
This is how you can update the drivers easily. But then the driver is updated for Logitech G910 only. This same procedure you need to follow every time to update every driver of the PC.
2. Automatic Method to Update the Drivers
This is the easiest method that a user can opt for updating all the drivers of the computer. You can simply find the faulty or outdated drivers and update them in just a few minutes. So let’s take a look at the steps which you need to follow to update drivers using driver updater software.
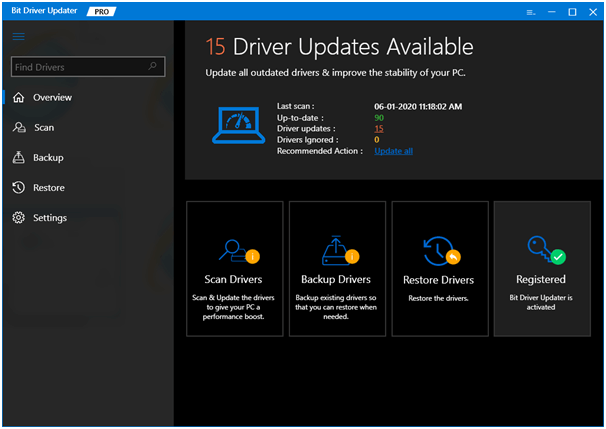
Open the software, click on the Scan option from the home screen.The software will proceed to scan for the faulty or outdated drivers in the system.After some time, the software will present you with the list of drivers which need to be repaired or replaced.Now you can either update the driver one by one by selecting them or you can update all the drivers in one go. (you can choose any option depending on your choice and requirements.)
This is how simply you can update the drivers using the software. As compared to reinstalling it is very easy and less time-consuming. Now you must be wondering which software to choose out of the thousands present in the market.
We have tried and tested software that can be the ideal software for you. Bit Driver Updater is the software that you can choose to update all your drivers easily in just minutes. This software is recommended by experts and the user reviews are also positive which is why we tried this software. The software is easy to use as it offers a very simple user interface. The best feature about this software is that it not only updates the drivers but it also optimizes the performance of the system which means the computer’s speed and performance will also be increased after installing this amazing driver updater software. Also Read: How To Update Device Drivers on Windows 10? {Simple Guide}
Logitech G910 Software and Drivers Downloaded and Updated Successfully
By looking at the above-mentioned methods you can easily download Logitech G910 software. The method for downloading software for other hardware will be similar. Some steps might change depending on the manufacturer and the model. We hope that we have helped you with the methods to download and update. If we did, let us know in the comment section below.


