Err_Empty_Response in Google Chrome
The Err_Empty_Response usually occurs while users are trying to access or login to certain websites using Google Chrome browser. In general, users have reported seeing the following types of messages with Err-Empty_Response error in Google Chrome.
Err_Empty_Response – No Data Received Err_Empty_Response – This page isn’t loading Err_Empty_Response – the website didn’t send any data, and might be down Err_Empty_Response – unable to load the webpage because the server sent no data Err_Empty_Response – This page isn’t working
First, make sure that your Computer is connected to internet and then try to fix the problem using troubleshooting steps as provided below.
1. Check URL Address
The simplest reason for Err-Empty_Response Error in Google Chrome is due to user mistakes in typing website name or the URL address or the websites that they are trying to reach. Hence, make sure that the Name and the URL Address of the website that you are trying to reach is correct.
2. Clear Browser Cache
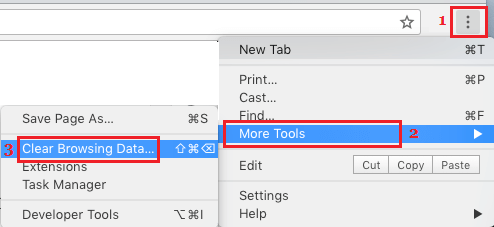
Another common reason for errors in Google Chrome is due to the browser cache becoming outdated or corrupted. Open Chrome browser > click on 3-dots menu icon > More Tools > Clear Browsing Data.
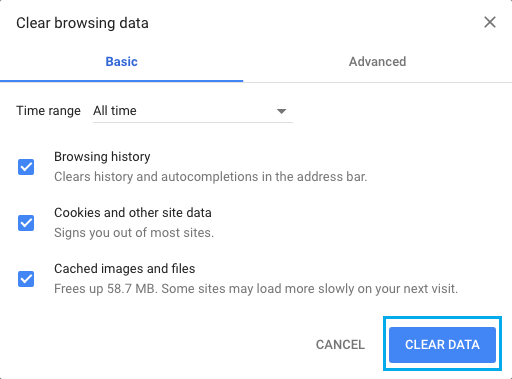
On the next screen, set All Time as the ‘Time Range’ > check Browsing History, Cookies and other site data, Cached images and files options and click on Clear Data button.
After Clearing Browsing Cache, see if you are able to connect to internet.
3. Reset Network Settings
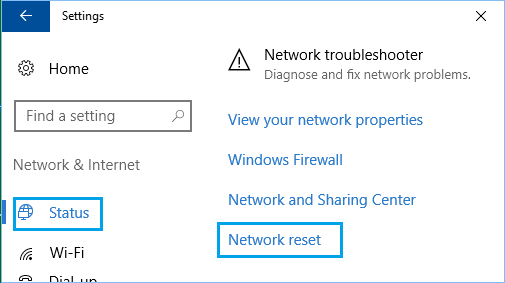
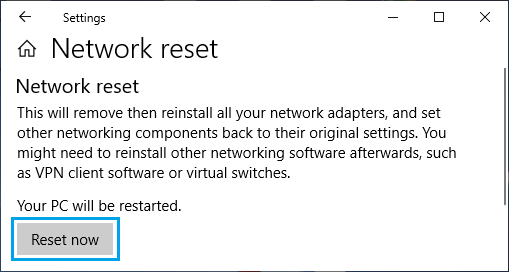
The problem could be due to changes in browser Settings. Hence, follow the steps below to Reset Network Settings on your computer to Factory Default settings. Go to Settings > Network & Internet > scroll down in the right-pane and click on Network Reset.
On the Network Reset screen, click on Reset Now button.
On the confirmation pop-up, select the Yes option to confirm. After the computer restarts, you will have to rejoin Wi-Fi Network by entering your Wi-Fi Network Password.
4. Flush DNS & Reset IP Address
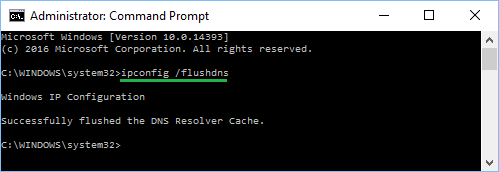
Open Command Prompt as Admin > type ipconfig /flushdns and press the enter key on the keyboard of your computer.
Next, type the following commands one-by-one and press the Enter Key after each command. After running above commands, close the Command Prompt window and Restart your computer.
5. Disable Chrome Extensions
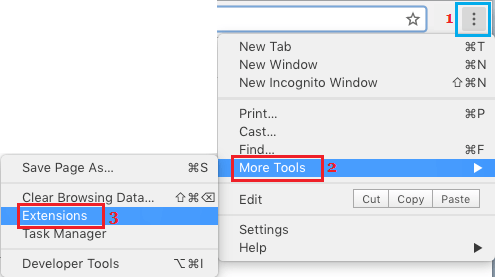
Sometimes, the problem is due to certain Chrome Extensions preventing the browser from connecting to certain websites. Open Chrome browser > click on 3-dots menu icon > More tools > Extensions.
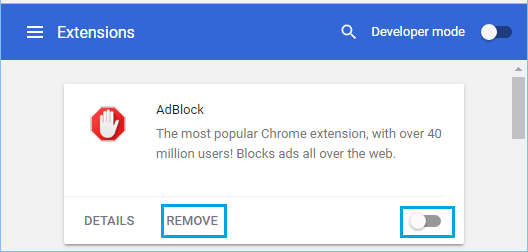
On the next screen, disable Extensions by moving the toggle to OFF position.
Restart Google Chrome browser to implement this change.
6. Clear Temporary Folder
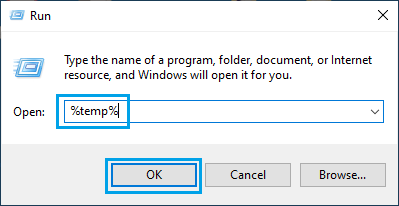
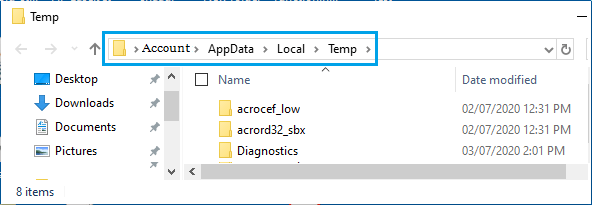
Right-click on the Start button and click on Run. In the Run Command window, type %temp% and click on OK.
Select All Items in the Temp Folder and delete them (select all items > right-click and click on the Delete option).
Note: You may not be able to delete certain files that are in use (Skip those files and delete the remaining ones). Restart the computer and check to see if you can now access the website using Chrome browser.
7. Change DNS Server
If above steps did not help or if you are frequently experiencing browsing problems, consider switching the DNS Servers on your computer to free public DNS servers provided by Google, Cloudflare or OPEN DNS. The steps to change DNS Servers in Windows 10 can be found in this guide: How to Change DNS Server in Windows 10.
Fix: Err_Name_Not_Resolved Error in Chrome How to Use Chromecast on Laptop or Desktop Computer
