USB Keyboard Not Working in Windows 10
The problem of USB Keyboard not working on a Window 10 computer could be due to various reasons, ranging from Keyboard Drivers becoming outdated, USB Reciever becoming faulty or corrupted to other reasons. Before going ahead with other troubleshooting steps, simply restart the computer and see if this helps in fixing the problem.
1. Disable Filter Keys
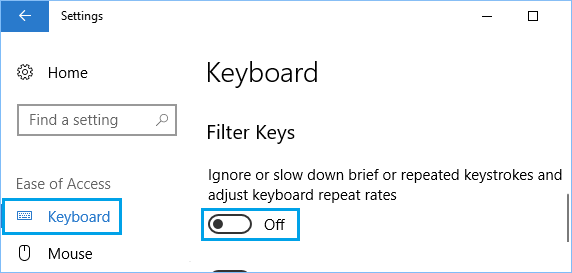
The Filter Keys function in Windows 10 is also known to cause keyboard problems. Go to Settings > Ease of Access > select Keyboard in the left pane and Turn OFF Filter Keys in the right-pane.
Restart your computer and see if the USB Keyboard is now working.
2. Make Sure USB Ports are Working
Sometimes, the problem is due to a particular USB Port or all USB ports not working. This can be confirmed, by checking if the USB Ports on the computer can recognize other USB devices. If USB Port/Ports are not working, you should be able to fix the problem using troubleshooting steps as provided in this guide: How to Fix USB Ports Not Working in Windows 10
3. Check for Updates
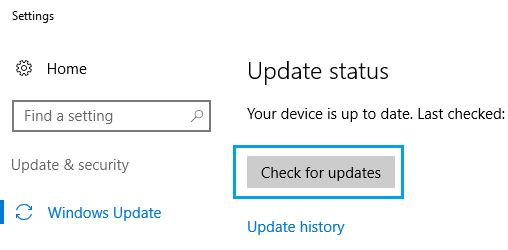
The problem could be due to a pending Windows update being downloaded, being installed or waiting to be installed on the computer. Go to Settings > Updates & Security > select Windows Update in the left-pane. In the right-pane, click on Check for Updates button.
Wait for Windows to check for available updates and install them on your computer.
4. Run Keyboard Troubleshooter
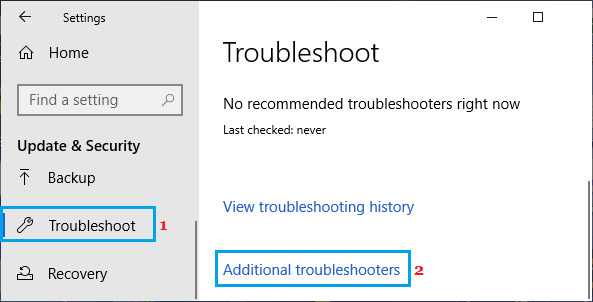
Go to Settings > Updates and Security > click on Troubleshoot in the left pane. In the right-pane, scroll down and click on Additional Troubleshooters.
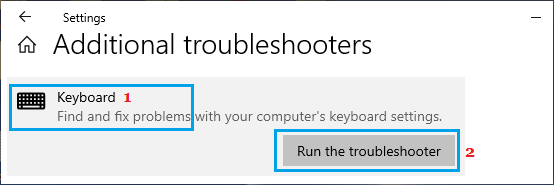
On the next screen, click on Keyboard and then click on Run the Troubleshooter.
Wait for the Troubleshooter to find and fix Keyboard related problems on your computer.
5. Manually Update Keyboard Driver
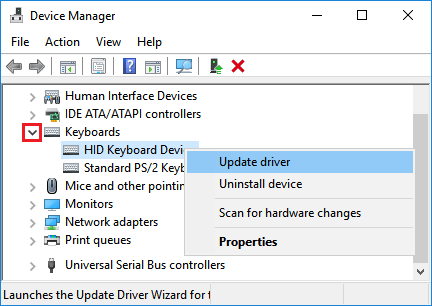
Right-click on the Start button and click on Device Manager. On Device manager screen, right-click on the Keyboard Device and click on Update driver.
6. Disable Fast Startup
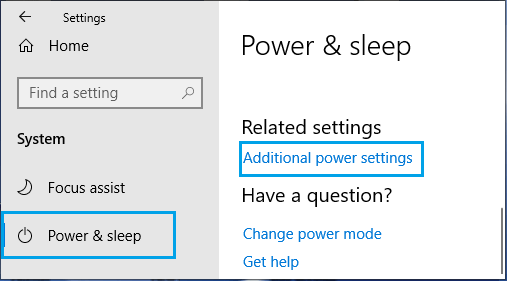
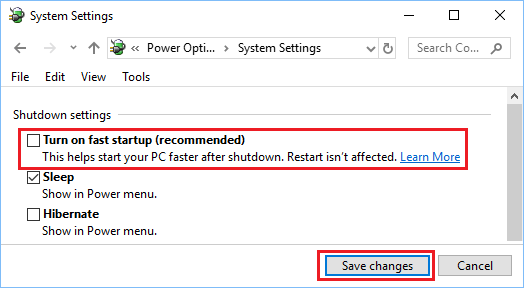
The Fast Startup feature as available in Windows 11/10 is known to cause problems with proper functioning of USB Keyboards. Right-click on the Start button and click on Power Options. On the next screen, scroll down in the right-pane and click on Additional Power Settings Link.
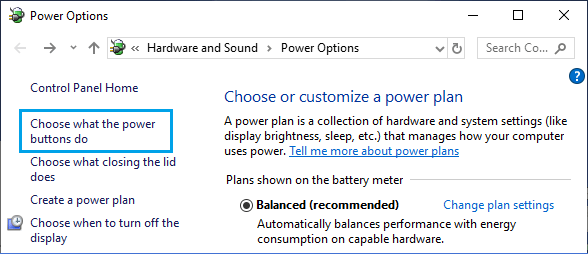
On Power Options Screen, click on Choose What the Power Buttons Do link.
On the next screen, scroll down to “Shutdown Settings” and uncheck Turn on fast startup option.
Make sure you click on Save Changes button to save this setting on your computer.
7. Uninstall Unnecessary Keyboard Devices
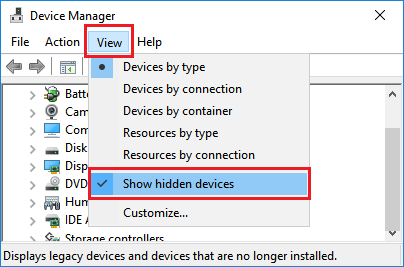
The problem of USB keyboard not working could be due to presence of multiple keyboard devices being installed on the computer. Right-click on the Start button and click on Device Manager option. On Device Manager Screen, click on View and choose Show Hidden Devices option in the contextual menu.
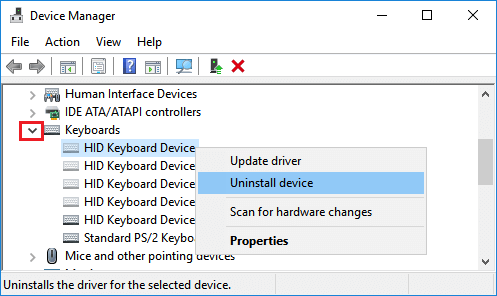
Next, uninstall all HID Keyboard devices on the computer. If the native keyboard on your Laptop is working, do not uninstall Standard PS/2 Keyboard device.
After removing external Keyboard devices, restart the computer and Windows will automatically install back the right Keyboard Device on the computer.
8. Uninstall Wireless Keyboard Receiver
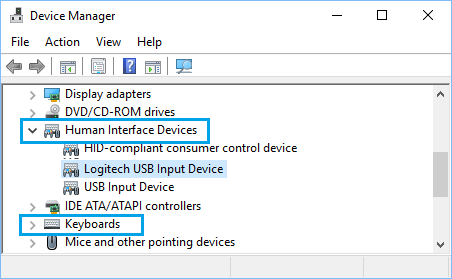
If you are using a Wireless External Keyboard with a USB Receiver or Dongle, you need to locate the USB Receiver on Device manager screen and uninstall it. Right-Click on the Start button and click on Device Manager option. On Device Manager Screen, right-click on the Keyboard Receiver and click on Uninstall.
Note: You should find the Keyboard Receiver or Keyboard input device in “Keyboards” section or in “Human Interface Devices” section. Next, remove the USB Receiver from the USB port and Restart the computer. After the computer restarts, insert the USB Receiver into the USB Port and you should now find the keyboard working.
How to Fix Keyboard Lag in Microsoft Teams Keyboard Shortcuts to Fix Frozen Computer
