“This App Can’t open” Error in Windows 10
As mentioned above, sometimes Apps installed from the Windows store may not open at all and display an error message reading “This app can’t open (App Name) while user account control is turned off.” Other variation of this error message that you may come across may read as follows.
“This app can’t be activated when UAC is disabled” “This App (Name) can’t be opened using the Built-in Administrator account” “A Problem with Windows is preventing Microsoft from opening App (Name)”
You should be able to fix this problem using any of the following methods.
1. Restart Computer
If the error Message reads “A Problem with Windows is Preventing Microsoft from Opening the App”, simply restart your computer and see if the problem goes away. If the problem is due to a minor software glitch or stuck program, restarting the computer can often fix such errors.
2. Use Windows Troubleshooter
The easiest way to fix “This App Can’t open” error in Windows 10 is to make use of the in-built troubleshooter on your computer.
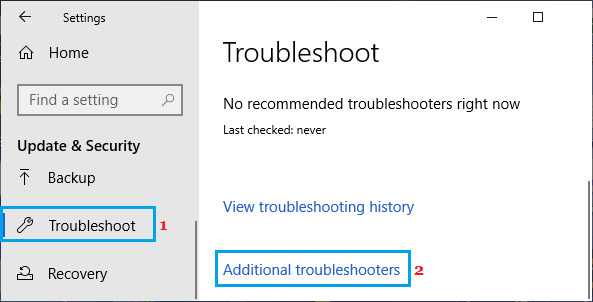
Go to Settings > Update & Security > select Troubleshoot in the left-pane. In the right-pane, scroll down and click on Additional Troubleshooters link.
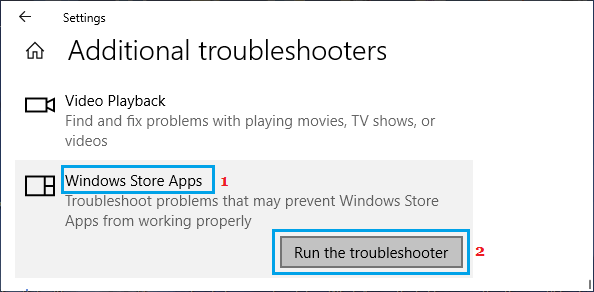
On the next screen, select Windows Store Apps and click on Run the Troubleshooter.
Follow the on-screen instructions as the Troubleshooter tries to find and fix problems on your computer.
3. Reset the App
Windows makes it really easy to Reset Apps, if they are causing problems on your device.
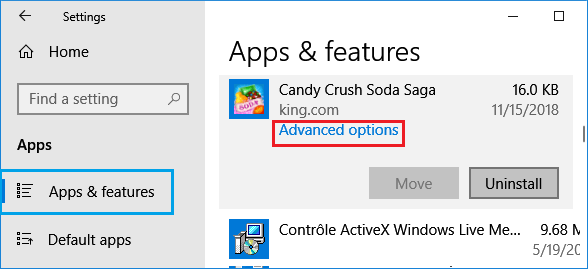
Go to Settings > Apps > click on Apps & Features in the left Pane. In the right-pane, select the App that is causing problems and click on Advanced options.
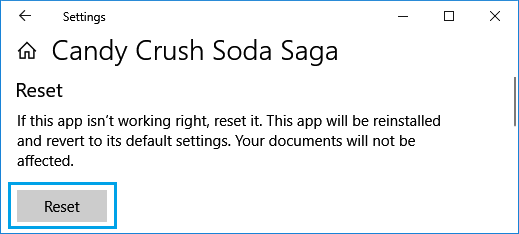
On the next screen, scroll down and click on the Reset button.
Windows will reinstall the App and revert it back to its default settings.
4. Enable UAC
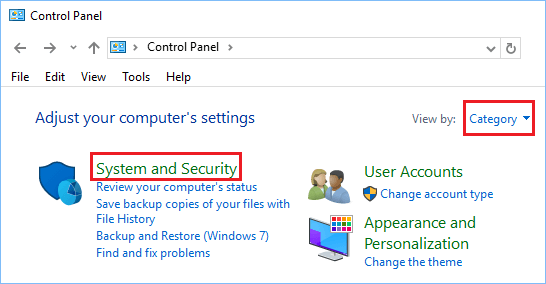
Follow the steps below, if the problem on your computer is due to UAC not being enabled and the error message reads “This app can’t be activated when UAC is disabled.” 1. Open Control Panel and click on System and Security.
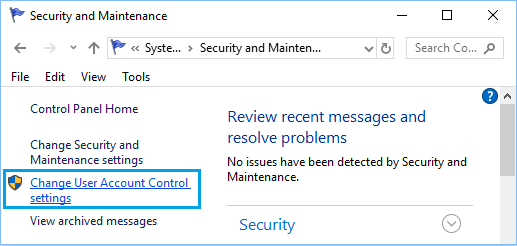
Next, click on Security and Maintenance > Change User Account Control settings.
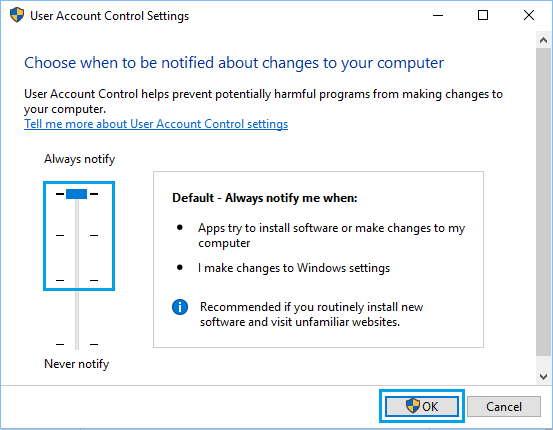
On the next screen, move the slider to any of the top 3 selections.
Click on OK to save this setting and Restart your computer to Apply this change.
5. Reset Windows Store Cache
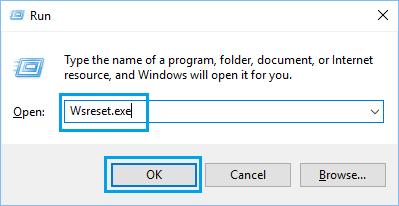
Right-click on the Start button and click on Run > Type wsreset.exe in Run Command Window and click on OK.
Wait for the command to be executed > Restart your computer and see if the problem is now fixed.
6. Re-Register Windows Store
If none of the above methods are helping, you can try to Reset Windows Store Apps and see if this fixes the problem.
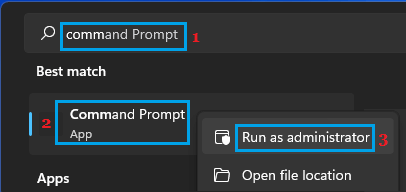
Type Command Prompt in the search bar > righ-click on Command Prompt App in the search results and select Run As Admin option.
In the Command Prompt Window type the following command and press the Enter key. Get-AppXPackage – AllUsers | Foreach {Add-AppxPackage -DisableDevelopmentMode -Register “$($_.InstallLocation)AppXManifest.xml”}
Wait for the command to be executed. This command will Reinstall all the native windows Apps on your computer, including the App that was generating “This App Can’t open” Error Message on your computer.
How to Stop Skype From Starting Automatically in Windows 10 How to Hide Files and Folders in Windows 10

