Remove Microsoft Account from Windows 11
While Microsoft provides the option to setup computer using a Local Account in Windows 11 (Pro), this option is not available in the Home Edition of Windows 11. The only way to setup a Windows 11 (Home) computer is to either use your existing Microsoft Account or create a New Microsoft Account, using Phone Number or Email Address. Once the computer is setup, you can create a Local Account, grant Administrator rights to this account and use this Local Admin Account to Remove the Microsoft Account from your computer.
What Happens When You Remove Microsoft Account?
When you remove Microsoft Account, all the data associated with your Microsoft Account, including all Files located on Desktop and stored in Documents, Pictures, Music, and Downloads Folder will be deleted. Hence, make sure that you transfer all your Files, Photos and other data to an External Storage Drive or to another Location on the computer. Another impact of removing Microsoft Account is that you won’t be able to setup Find My Device on your computer, which allows you to Find, Lock or Erase your lost or stolen device. The good news is that you can always add back the Microsoft Account to your computer at any time and enjoy all the benefits of using Microsoft Account.
Step 1. Create New Local Admin Account
The first step is to Create a New Local Account on your computer. For this, you need to be logged in to the computer using either Microsoft Account or a Local Account with Admin Privileges.
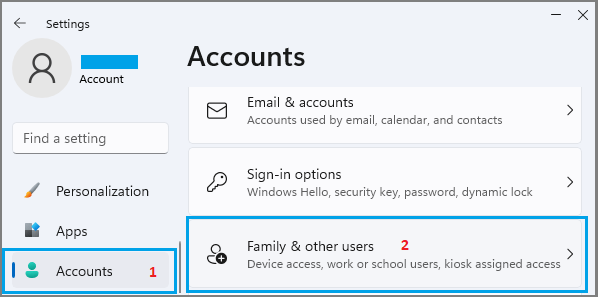
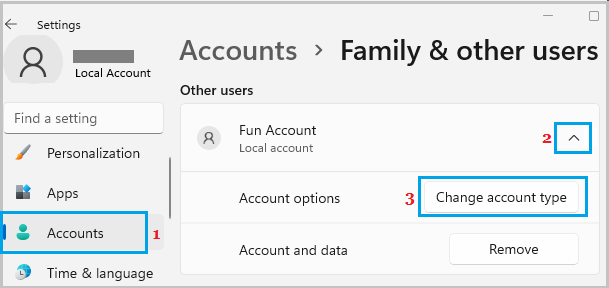
Click on Windows Start button > Settings icon > select Accounts in the left-pane. In the right-pane, scroll down and click on Family & Other Users.
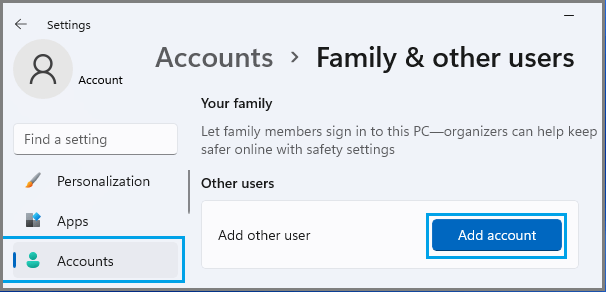
On the next screen, click on Add Account button, located under “Other Users” section.
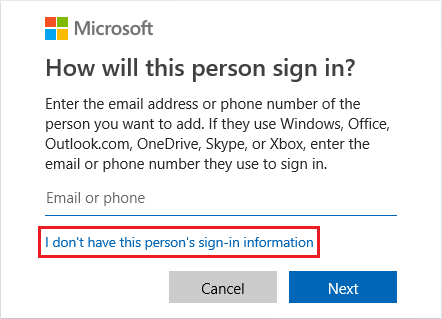
On the next screen, click on I don’t have this person’s sign-in information link.
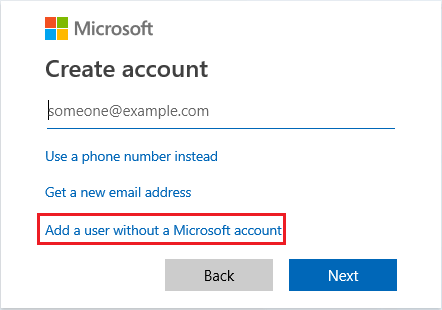
On Create Account screen, click on Add a user without a Microsoft account option.
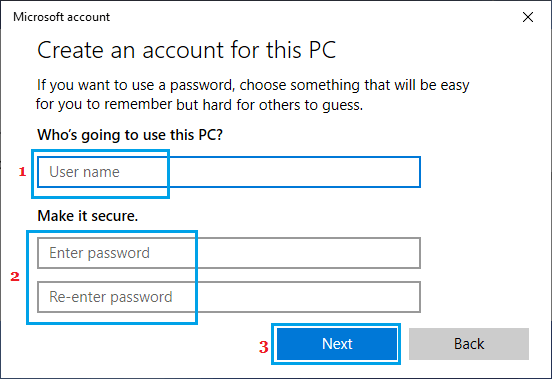
On the next screen, enter User Name, Password for your new Local User Account and click on Next to create a New Local Account on your computer.
On the next screen, click on the New Account that you just created and select Change Account Type option.
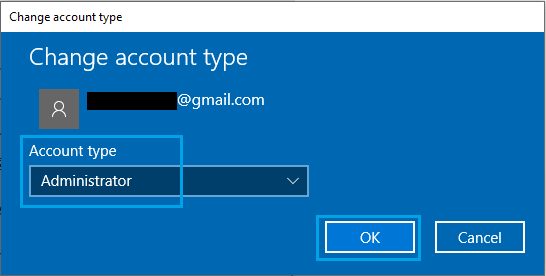
On the next screen, click on Account Type Down Arrow > select the Administrator option and click on OK.
This completes the creation of Local Admin Account on your computer, which means you can safely remove Microsoft Account from your computer.
Step 2. Remove Microsoft Account from Windows 11 PC
Logout from Microsoft Account and login to Local Admin Account that you created in Step 1 (Above) and follow the steps below to Remove Microsoft Account from your Windows 11 PC.
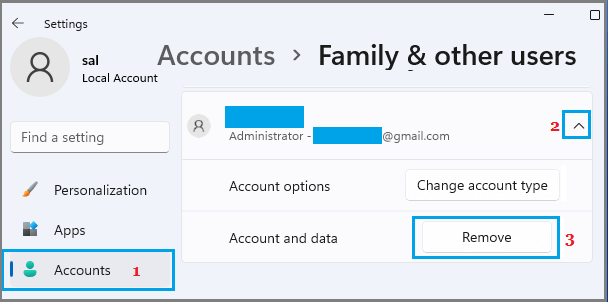
Click on Windows Start button > Settings icon > select Accounts in the left-pane. In the right-pane, scroll down and click on Family & Other Users.
On the next screen, select your Microsoft Account and click on the Remove option.
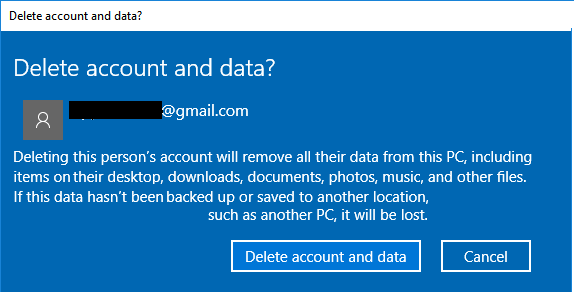
3. On the next screen, click on Delete account and data button.
As mentioned earlier, all the data present in Microsoft Account will be deleted and the Microsoft Account will be removed from your computer.
How to Change User Account Type in Windows 10 How to Reset Local User Account Password in Windows 10
