Best Workarounds for USB Headset Not Working Issue
If your USB headset has suddenly stopped working then luckily there are certain solutions that you can use to fix your problem. We have brought you the best and the easiest ways to troubleshoot the headset problem on your Windows 10. Have a read.
1. Run the Troubleshooter for Hardware and Devices
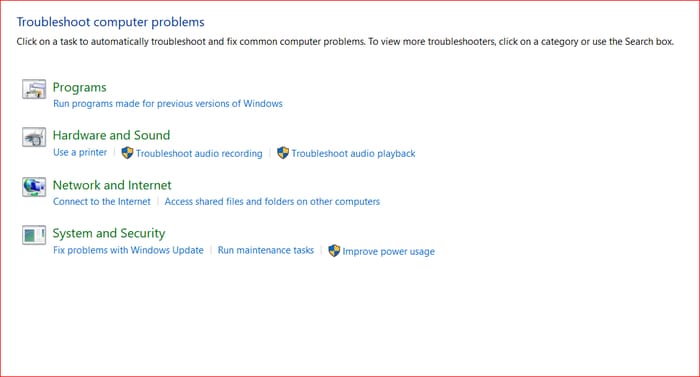
Fortunately, you can count on Windows 1o troubleshooter before trying any other method to fix the USB headset issue. It is designed to address the common problems that you usually face in the operating system. In order to resolve the headset issue, you can access the troubleshooter and see if that helps. Here are the steps to solve the USB headset problem using Windows troubleshooter: Step 1: Hit the Windows + S keys on your keyboard to open the Search box. Step 2: Type Control panel in the search box and then hit Enter. Step 3: Now that you are on the Control Panel page, you need to click the drop-down menu (Next to the View option) and choose the large icons option. Step 4: Hit the Troubleshooting option and then click on Hardware and Sound. Step 5: Then, you need to select the Hardware and Devices in the next page and hit Next. Once you have finished the steps, you have to wait while the troubleshooter scans and detects any problems in your USB headset. Then, follow the instructions given on the screen in order to troubleshoot the issue. Also Read: USB 3.0 Driver Download and Update for Windows PC
2. Update Your Audio Driver
One of the major reasons why you are facing the USB headset not working Windows 10 issue on your PC is due to an outdated, missing, or corrupted audio driver. Know that a faulty driver stops the system and devices to work up to their functionalities and thus, you need to make sure it is updated. If you are not able to use the USB headset well then you can update the sound driver on your system in order to resolve the issue. You can either update it using the Device Manager or you can follow the automated process. For updating drivers either manually or automatically, we’ve shared the steps below!
Way 1 – Manually Update Audio Driver with Device Manager
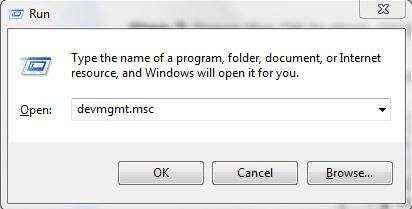
Here is how to update the audio driver using the Device Manager: Step 1: Press Windows + R keys on your keyboard and launch the Run box. Step 2: Then, type devmgmt.msc in the Run dialog box and hit the OK button.
Step 3: You should be able to view a list of all the devices on the Device Manager page. From there you have to locate and expand the Sound, Video, and Game Controllers branch.
Step 4: After that, right-click the USB headset and choose the Update Driver option from the menu.
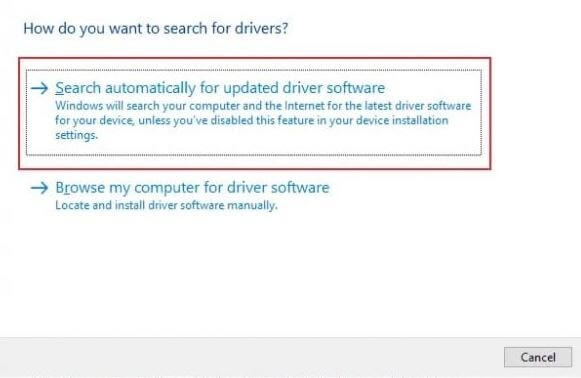
Step 5: Now, you have to select the ‘Search automatically for updated driver software’ option on the next page.
Now you need to wait for a while Windows finds and installs the latest updates for your audio driver. You can also visit the manufacturer’s website in order to avoid the risk of fetching an incompatible driver and search and download the right audio driver. However, this process is a bit tiring and demands patience while on a hunt. Thus, it is recommended to seek any best third-party software that will automatically detect all the driver-related issues and required updates. It will find and download the compatible drivers and hence, you will be able to enjoy an optimized performance on your Windows 10 PC.
Way 2 – Automatically Update Audio Driver Using Bit Driver Updater
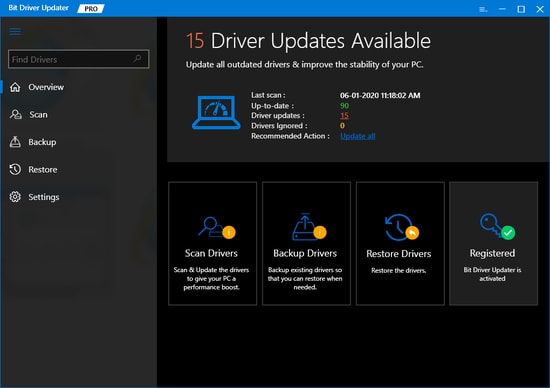
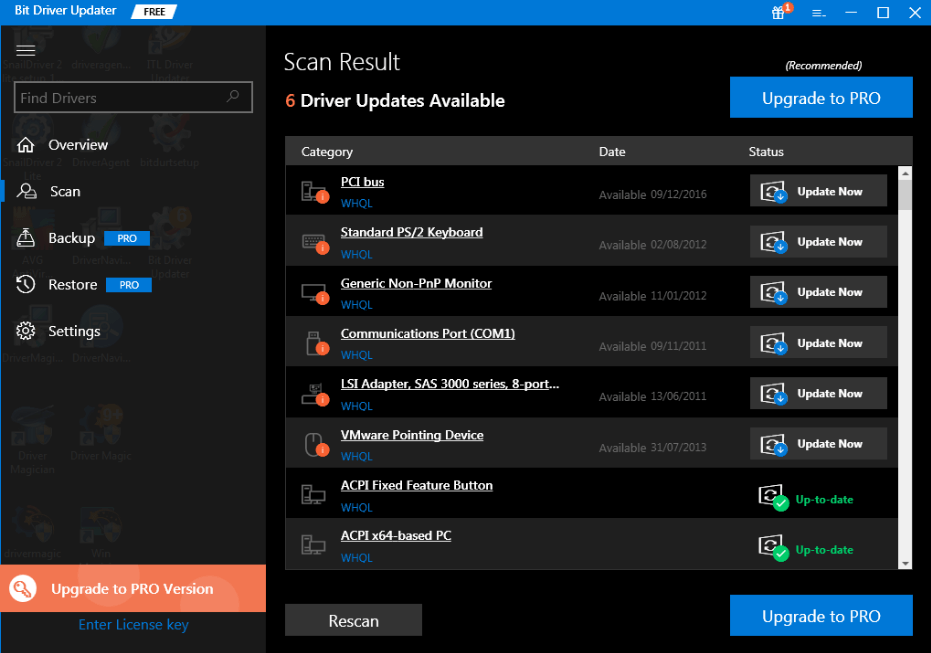
Above we’ve explained how outdated or corrupted audio drivers are responsible for a USB headset not detected on Windows 10. Along with it, we’ve also shared the steps to update the audio driver with the Device Manager. However, if you have proper tech skills then you can go with the Device Manager otherwise you can follow the automated process. We use Bit Driver Updater for updating drivers automatically & frequently. Hence, we suggest the same to you. Working with Bit Driver Updater is extremely effortless. Here is how to update audio drivers through Bit Driver Updater: Step 1: Download and install the Bit Driver Updater. Then, run its setup file to complete the installation.
Step 2: Once successfully launched on the system, it will automatically start scanning for outdated, or faulty drivers that require an update.
Step 3: After this, it generates the list of drivers that need an update, you need to follow-up an entire list before taking any actions.
Step 4: At last, to update the outdated drivers click on the Update Now option displayed next to the drivers. And, you can also update all the drivers at a time by clicking on the Update All option presented at the bottom of the list.
That is all you need to follow for updating the audio drivers with Bit Driver Updater. This application also fixes the other windows-related issues including the BSOD issue, often failures, slow performance of the system, and many other issues. On top of all, it doesn’t require any manual support from users. Plus, it has the capability to boost up the performance level of the system by up to 50%. So, we recommend you download the software from the button given below to get the latest updates instantly.
Also Read: The Audio Service is Not Running On Windows 10 [Solved]
3. Configure Privacy Settings
If your USB headsets are not getting recognized by your PC then you can check up on the privacy settings on your system. Note that, there are certain settings that can prevent the apps on your system from using your microphone. So, if you want to learn how to get a computer to recognize a USB headset, you need to know how to configure your privacy settings for peripheral devices. Here are the steps: Step 1: Press the Windows + I keys on your keyboard to launch the Settings app. Step 2: Once you are on the Settings page, click on the Privacy section. Step 3: Move to the left pane and choose the Microphone from the options. Step 4: Now, go to the right pane and enable the Allow apps to access your microphone option. You can look into the apps one by one and see which ones you would like to give access to the USB headset’s microphone. Once you have made the changes to your privacy settings, you can use your USB headset and check if the issue is gone. Also Read: [Fixed] Headphones Not Working On Windows 10
4. Switch Your Default Audio Device
If the USB issue still persists on your Windows 10 system, then you can try setting your USB headset as a default audio device in order to fix the problem. In order to do that, you have to follow these steps: Step 1: Navigate to the bottom-right side of your taskbar and right-click on the Speakers/Headphone icon. Step 2: Choose the Open Sound Settings from the options. Step 3: Now, move to the right pane and hit the Sound Control Panel from the Related Settings. Step 4: After the Sound settings window appears, you need to choose your USB headset. Step 5: Now, hit the Set Default button and then, click the OK button to save the changes you have made. Once you complete these steps, you can check if your headset is working now. Also Read: Download USB PnP Sound Device Drivers on Windows 10 Final Thought Can you listen to the music now? If yes, then these solutions have worked. If you know more such troubleshooting methods to fix the USB headset issue on Windows 10, then you can share it with us in the comment section. Did you find the article helpful. Don’t forget to let us know.
